How to Make a Ouija Board: Step-by-step & Detailed
How to Make a Ouija Board
So, you are looking to make your own homemade Ouija Board. Whether this is for Halloween, or just for your own spooky reasons; here is how to make your own DIY Ouija board step-by-step. Don’t worry, there will be pictures and details along the way to help you understand the process fully.
Step-by-step Instructions:
This is the best step-by-step process on how to make a Ouija board at home. Get a wood board. Sand it down smooth. Write your letters, numbers, and words in pencil where you want them. Trace the stencils with a calligraphy tipped soldering iron. Varnish the board with a clear coat. Use it and enjoy.
Now, let’s see the step-by-step process of how to make your very own Ouija board!
Paper Ouija Boards (The Fast and Easy Method):
If this is your first Ouija board you have ever tried to make yourself, you will most likely want to start with a quick and easy paper version. Here are the items and exact steps you will need to create a paper Ouija board at home.
Items You May Need:
Poster board or other paper
Scissors (maybe)
Pen or pencil
Paper or glass cup
Making the Paper Ouija Board:
1. You will start by taking your piece of paper, hopefully a big enough paper for the project, and write 2 to 3 rows of letters that make out the alphabet. These letters are going to be what is used during the use of the board to spell out words.
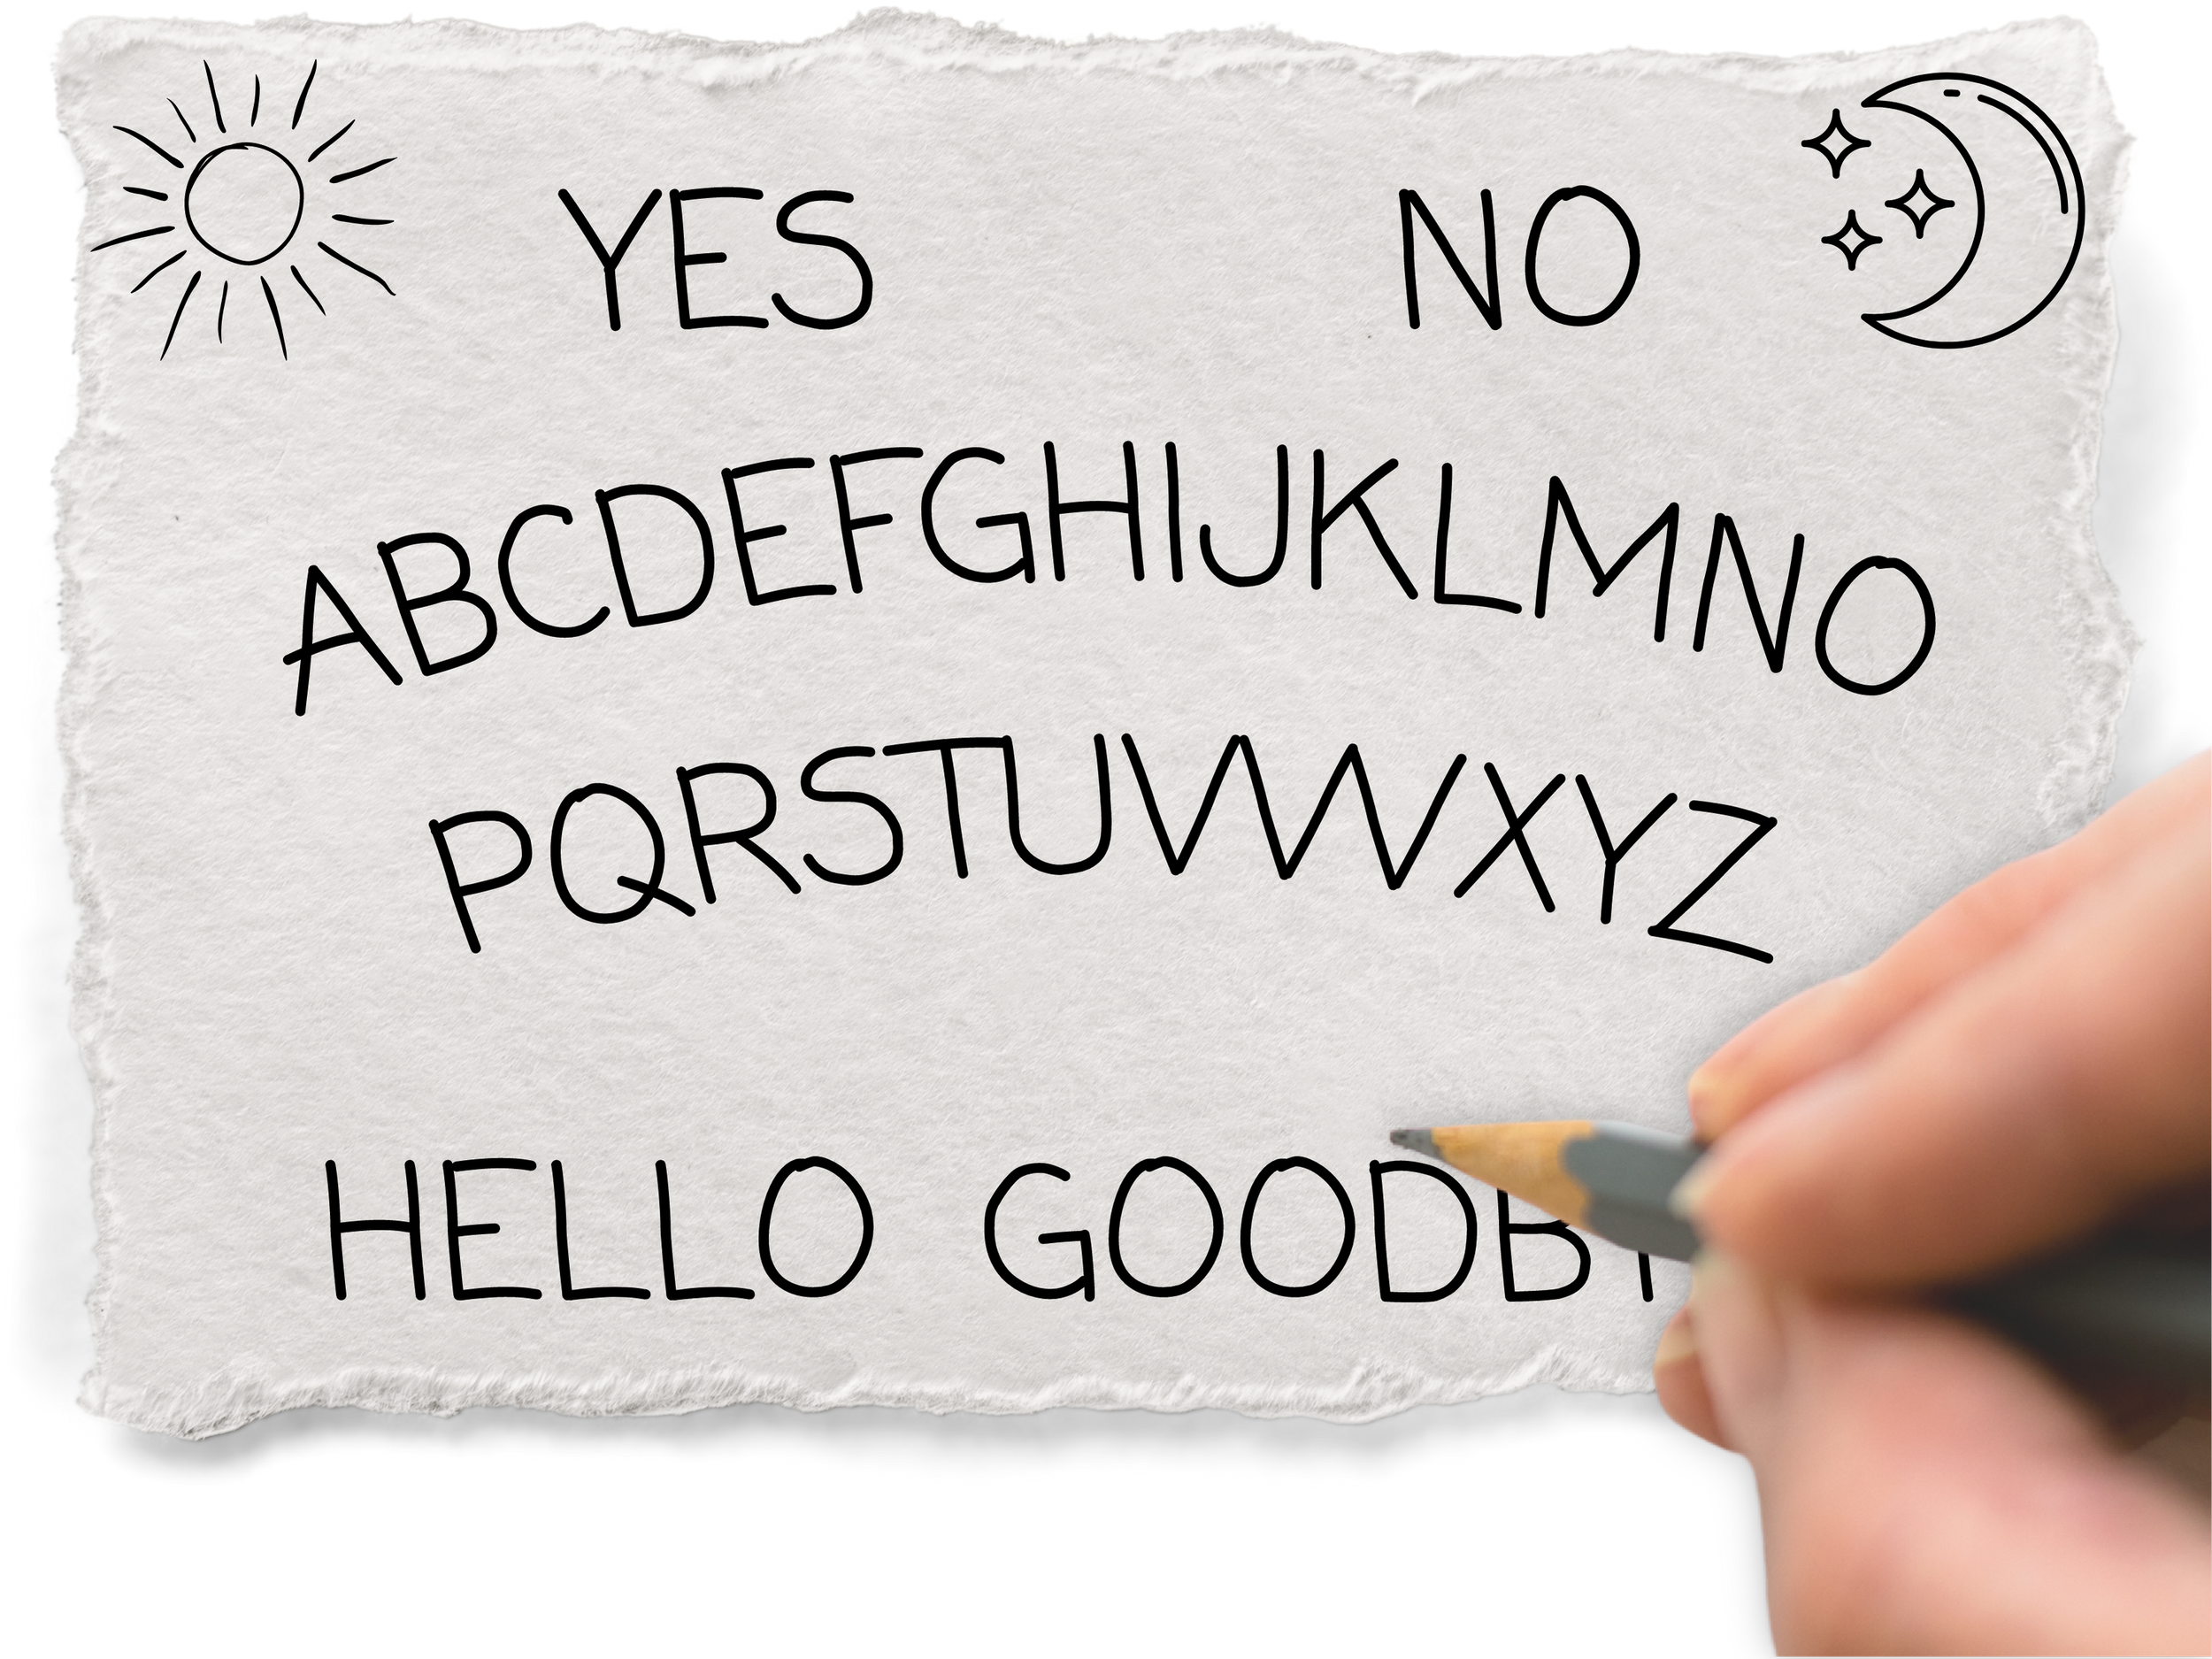
2. Next, you will write the numbers 1 to 9 under the letters, and at the end of these 9 numbers you will place a zero. The number zero will allow you to make bigger numbers when used with the other numbers in the lineup.
3. Write the words “Yes” and “No” at the top of the page on their own respective sides of the paper. “Yes” on the left side of the paper and “No” on the right side of the paper. These words will be used in order for the spirit(s) to answer any questions you may ask.
4. Now you will write “Hello” and “Goodbye” under everything. Placing hello on the left side and goodbye on the right side, this will go under the letters and numbers. It will be used for the spirit(s) to tell you when they are there and when they are leaving.
5. The final step in the process will be for you to draw a sun on the upper left-hand side (outside of the “Yes”) and a moon on the upper right-hand side (outside of the “No”).
How to Use the Paper Ouija Board:

Now that you have made the actual board itself, you will want to get either a glass or a clear plastic cup. As long as the cup is see-through, that is all that matters. Place this clear cup or glass onto the board upside down. This cup will act as the quick and easy version of a planchette.
Either sit down at a table by yourself, or with a group of friends.
Pick a person to ask questions for the spirit(s) to answer.
Everyone places one hand on the glass/cup.
Let the communication begin!
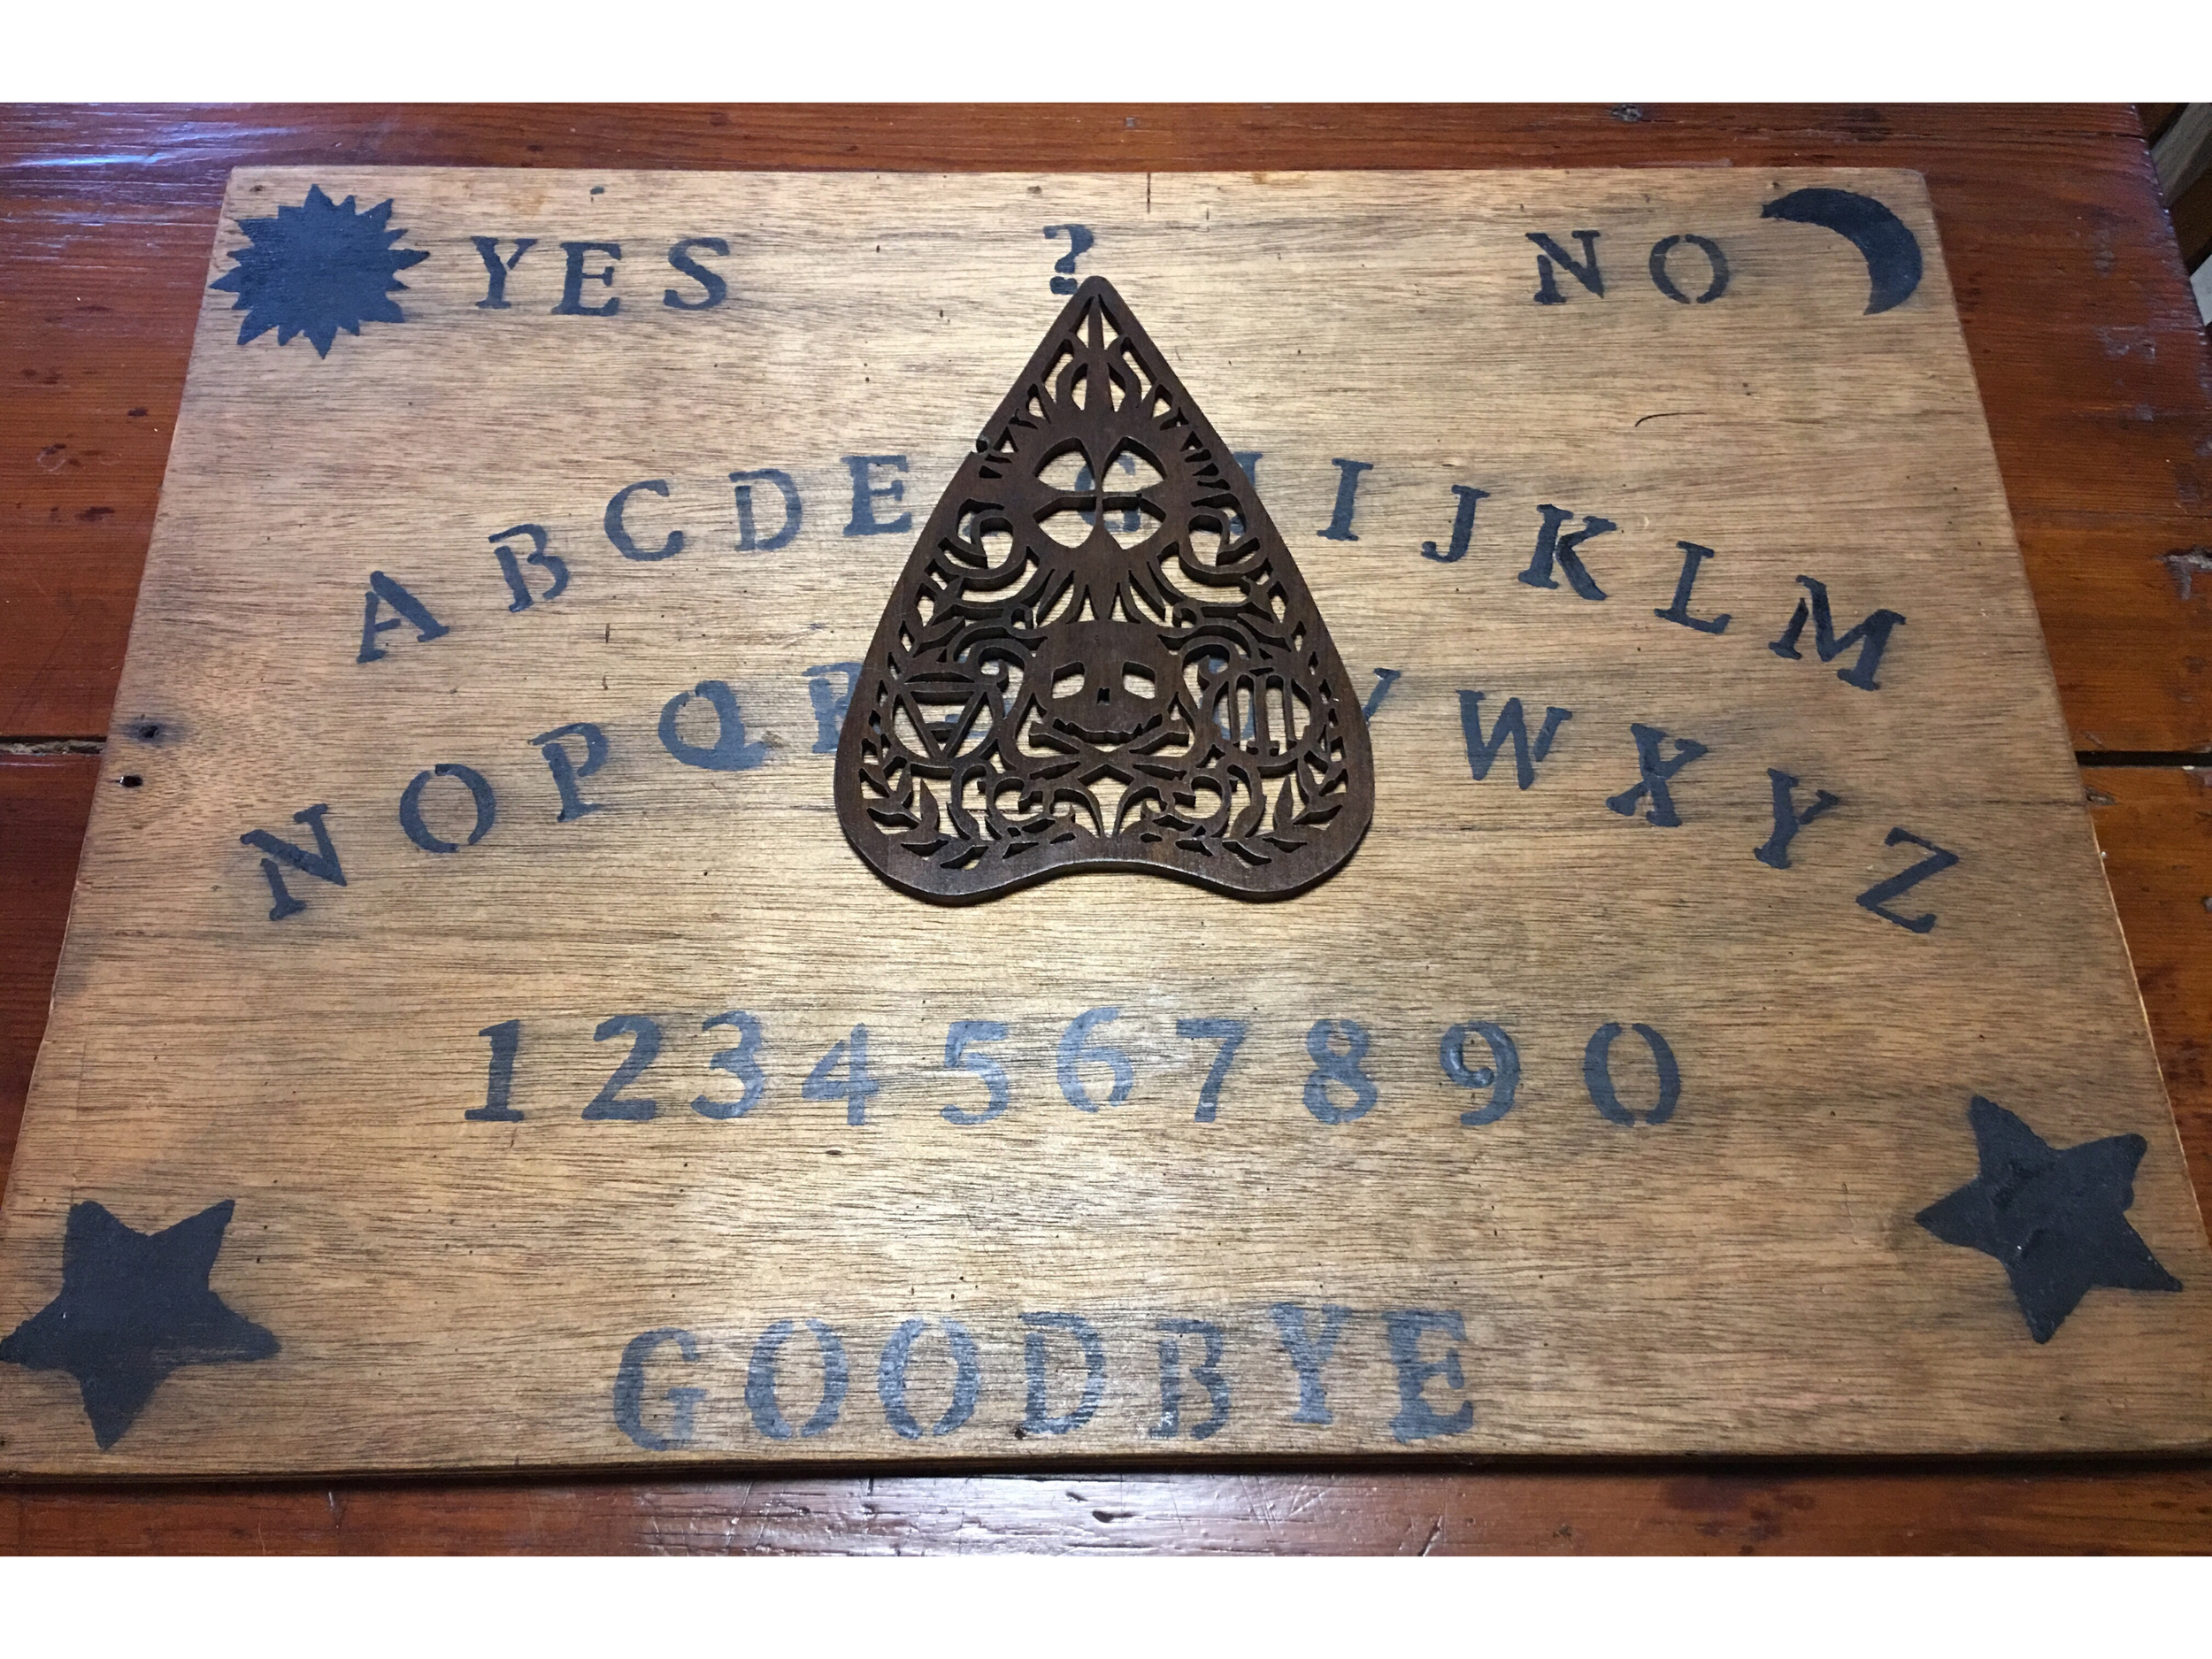
Wooden Ouija Boards (The Longer Project with Higher Quality):

This is the board that will come after a little bit of experience using one. Now you can customize your own board in a more permanent way and increase the quality of your spiritual tool. Don’t hurt yourself, because there are some tools involved in the process of making this one that can cut or burn you if you aren’t careful. The resulting product is going to give you so much increase in your Ouija board resolution.
Items You May Need:
A piece of wooden board in a square or rectangle shape.
Soldering iron w/calligraphy end on it.
Paint or wood varnish (Optional)
Pencil
Regular paper
Rag
Making the Wood Ouija Board:
1. Before you start anything, it is a great idea to take your soldering iron with its calligraphy tip and practice writing on a spare piece of wood. You will need to get used to using this and learn the nuances of the tool in order to get the most out of it later.
2. Now, you will need to sand down your wood. Start with a lower grit number and then move to the higher number grit as you go. Depending on the type of wood that you have and the condition it is in to begin with, you may want to start somewhere around 80-100 grit. You can then move up in grit number to 120, 150, 180, 220, 240, and finally 320 if you want it to be super smooth like glass.
3. This is the step that your fancy carbon paper can come in handy, if you so choose. Carbon paper is used as a transfer paper. Think about a police officer’s note pad when he writes you a ticket. He only writes the information once, but you get an exact copy from the paper that was under the carbon paper that he wrote it on. This is what we are going to do with the carbon paper, and we are going to use it as a sort of stencil. You can either do this or free hand draw on the letters, numbers, and words with a pencil. The exact locations of everything are noted above in the paper Ouija board information.
If you are looking for a place that you can buy carbon transfer paper, there is a really good set right HERE on Amazon.com for under $4!
4. Now, it is time for the tricky part. You will be using the soldering iron in this step as you trace the stencils you made with the pencil or carbon paper. Go slow and be meticulous, as this step is permanent.
If you don’t have a soldering iron, they are actually cheap and easy to buy on Amazon.
5. Clean the whole surface and give the board some time to come back down to room temperature from the soldering process.
6. You can add varnish and/or wood stain to your board at this point. You will make the board last longer, look better, and even perform better with your planchette if you put a clear coat varnish on top of everything.
7. Add a little bit of flair if you want to. You can paint on the outside edges of the board and add in some personality to make it unique.
8. You will need a more upscale planchette for this board, so you can either make one yourself or find one to buy.
If you choose to just buy a planchette, here is one that is a solid choice on Amazon.com
Ouija Board Rules:
1. Be as specific as you can. Do not be general or vague, because this leaves the door open for any random spirit to answer. This can have negative consequences.
2. Be respectful. This should go without saying, but if you disrespect a spirit, it could possibly go sideways for you.
3. Take what is said with a grain of salt. Evil spirits are known to lie in order to manipulate people any way they can. If you believe any and all of the information given to you, that could very well lead you down a negative path.

4. Don’t do it alone.
5. Do NOT leave the planchette on the board by itself.
6. Assign a question asker and a note taker.
7. Don’t play in your own house or a graveyard.
8. Don’t use the board if you are sick.
9. Don’t ever let a spirit count down.
10. Do not ask anything about God.
11. Do not ask when you are going to pass on.
12. Put a piece of silver on the board both while you are using it and not.
13. Always close the board out in the right way.
14. Do not ever burn your board.
15. Always say goodbye.
Ouija Board Stories:

There are so many stories from around the world about people that have used a Ouija board to talk to the spirits. There are stories about people that have had full conversations and lasting contact with damned souls that reside in Hell. Possessions, physical harm, and hauntings have come as a result of these times of contact with evil spirits.
The planchette has been known to move on its own on many occasions. Most of these are likely just stories and/or tricks that friends or mystics have played to illicit a rise out of other people. However, with the Ouija board being in existence for around 150 years, there are surely plenty of real stories out there from people that have actually had encounters due to using a Ouija board.
More Interesting Information about Ouija Boards:

Many people actually choose to make Ouija board tables. Yes, you heard that correctly. An entire table made into a Ouija board that serves the main purpose of contact spirits from beyond the physical realm. Using a table such as this will surely make you a power user of the dark and mysterious. Or, maybe it will just look really cool as a coffee table.
The word “Ouija” was supposedly learned by actually using the board itself. It is supposed to be a word for “good luck” in an ancient language from Egypt.
When was the first Ouija board invented?
In 1886 there were mystics in the state of Ohio that started using the first versions of these boards in order to speak with spirits. After this, Elijah Bond released his manufactured boards for the masses in 1890.
The Parts of a Ouija Board Explained:
What is a Planchette used for?

Planchette is actually a French word that means “little plank”. This is usually a small piece of wood in the shape of a heart that is used in order for spirits to speak through the living by pointing at letters, words, and numbers on a Ouija board.
If you don’t want to make your own, you can find good ones right HERE.
What do the sun and moon on a Ouija board mean?
Well, these are on the board in order to tell if the spirit that you are talking to is evil or good. If the spirit(s) choose to use the sun, they are a good spirit. If, however, they choose to use the moon, they are an evil spirit.
Recap & Summary:
You now know exactly how to make your own DIY Ouija board at home. This isn’t Wikihow, you got a detailed instruction on some of the history and meanings behind this tool for the mystical arts as well as learning how to make a homemade Ouija board easily and with high quality.
Now you can make a board and conduct a séance for yourself. Talk to the dead and make conversation with spirits through your custom Ouija board with friends and family. You know the rules to using one, some interesting facts about them, and some stories and history that make them so unique and mysterious. You are sure to have a spooky and scary time under a dimly lit room with candles everywhere and a spirits words at our fingertips.
If you enjoyed reading this article and want to find more like this, there are actually many like it right here on our website. You can find more spooky and informational articles like this right HERE.
Thank you for taking the time out of your day to read this article! : )